From the Point of Success Order Entry main screen, press the Setup button. The Workstation Setup screen will display. It has three tabs: General, Printers, and Cash Drawers

In the General tab, there are several settings:
Log out on return to Home Menu - logs the system out between orders so each new order requires a login code first. After any function is accessed in the system and the user is returned to the main screen, they will have to re-key their PIN number to get back into the system. If this is checked, it will also logout on the main screen if "No Sale" is pressed.
Workstation Name: The name of the workstation being setup. This displays on the main screen and is assigned to open tills. If this is changed, the ownership of the terminal disconnects from any open till. Take care to make sure not to break this link. If the workstation cannot access a till, the workstation name can be changed here temporarily to close or otherwise access a till owned by another terminal.
Show Touch Screen Keyboard - a keyboard display that pops up everywhere data entry is required by keyboard. This makes it unnecessary to have a keyboard out and accessible to spill food or drinks on.
When saving an order, start the next order automatically - This starts the next order immediately, skipping the main screen.
Print tab (customer receipt) when Done - This prints the customer receipt as soon as the order is taken instead of waiting until payment is made. This is commonly referred to as "Print Bar Tab Automatically on Done" as well.
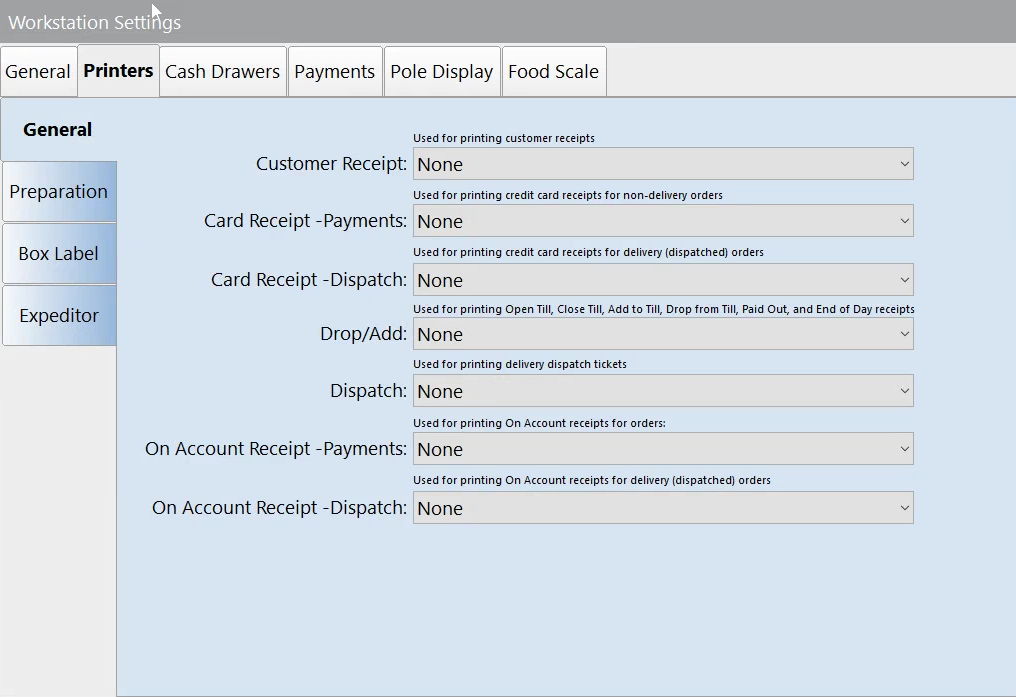
In the Printer setup tab, the routing of each printer is established. For each type of printing, select the printer from the drop down list. This list is taken from the Windows Print Drivers list. Any printer available to the Windows operating system will be listed here. Make sure to select the proper printer to accept the proper program output.
If a printer is not listed in the drop down list, it has not been properly installed or networked and is not available for printing. Consult your system administrator or network technician to get the printer installed properly and the printer will automatically display on the list.
Dispatch List Refresh Time: This setting sets the refresh time of the dispatch list. The list will automatically refresh at the interval recorded. If automatic refresh is not desired for the dispatch list, enter 0 for this value.

To enable a cash drawer in connection with the current workstation, check the 'Enable Cash Drawer' check box for up to 2 cash drawers. These cash drawers are controlled by the receipt printer and setup for the 'Open Drawer Codes' is what is called an escape sequence. Some common escape sequences for popular printers are listed below. Consult the printer's manual if these codes are not adequate. If one set of codes does not work for the cash drawer being set up, try a different set of codes from the same brand of printer.
Epson and Samsung control codes:
Cash drawer trigger: 27,112,0,48
Partial cut (option): 27,105
Epson alternate cash drawer trigger: 27,112,0,64,240 (generates longer pulse)
Star control codes:
Cash drawer trigger: 7
Partial cut (option): 27,100,48 or 27,100,49
Citizen control codes:
Cash drawer trigger: 7
Partial cut (option): 27,80,00 or 27,80,01
(Some Citizen printers also use Epson control codes)
Ithaca POSjet control codes:
Cash drawer trigger: 27,120,1
Auto-cut (option): 27,118
Run Macro (for logo printing) <27><31><114>macro name<0> (Use only with POSjet driver)
Note: If you have trouble printing, or can't make your cash drawer open, make sure your printer port is set to EPP or Standard and not ECP. Many new computers come from the factory with the printer ports set to ECP. This setting is not compatible with most receipt printers. Contact your computer's manufacturer for instructions on how to check the setting of your printer port.