Ticket List (Order Entry)
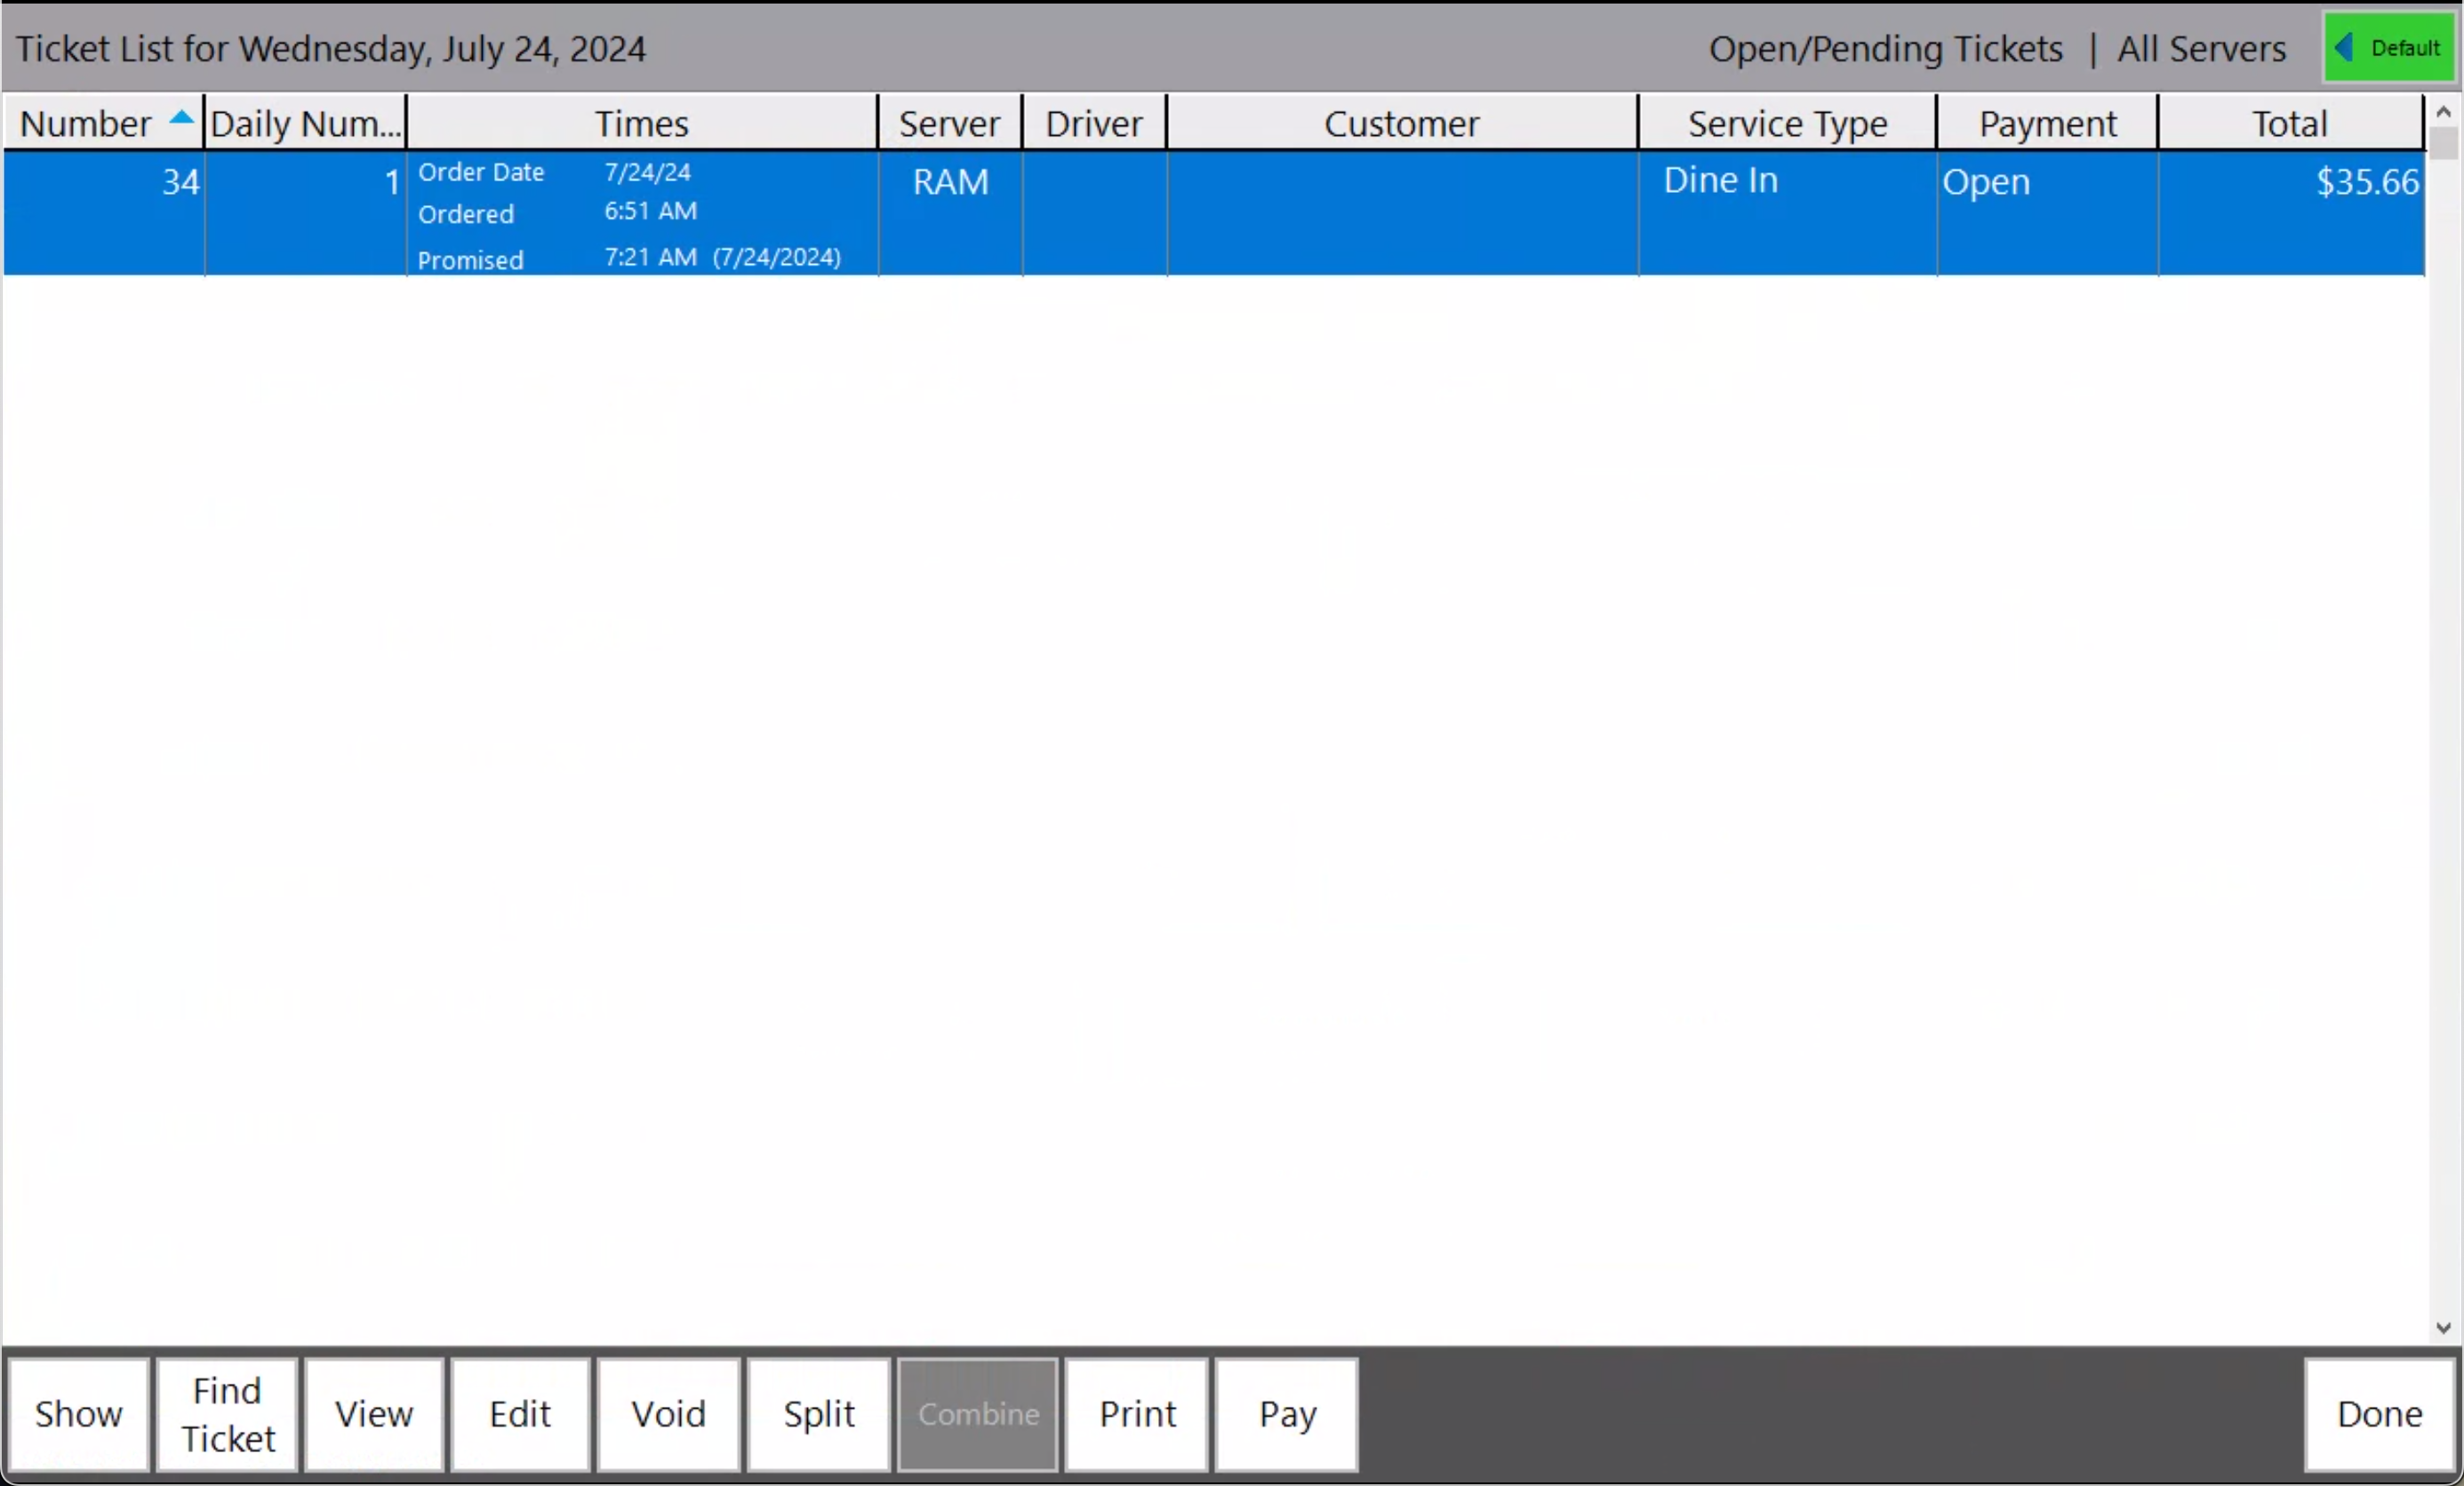
From the Point of Success Order Entry main screen, press the View Tickets button. A list of tickets is displayed.
In the Ticket List by default all the open tickets are displayed. There are several actions that can be taken to manage the items on the ticket list.
Number - Use this button to select a particular ticket number. All tickets have a unique identifying number that can be easily accessed using this button.

Show - Use this button to display all open or closed items. By default, open items are shown.
- Calendar - The calendar displays the currently selected display date and allows the user to choose any day by touching the date. Navigation to different months is also available atop the calendar.
- Server Tickets/Driver Tickets - Server Tickets OR Driver Tickets can be displayed on the ticket list. By default, the Server Tickets are displayed.
- Show Server/Driver Tickets for [All] - This button controls which person's tickets are displayed.
- All Servers - All means everyone's tickets are displayed regardless of individual staff member.
- My Tickets - means the signed-in person's tickets are displayed.
- All Types (Service Types) - This filter allows the user to restrict the ticket display to a certain service type. All Types shows every Service Type mixed together.
- Show Tickets that Match - Any of the criteria below this box can be entered to assist in the search.
- Clear - To clear the search criteria already entered, press this button
Order Status
Open - Unpaid orders
Pending Payments - Pre-authorized, but not finalized orders that have been placed on hold awaiting tip information.
Open and Pending - A mixture of Open orders and Pending Payments orders on one screen. All these orders need to be paid or finalized.
Closed - Paid orders
Future - Orders set for Future Ordering
Voids - Voided orders
Discards - Orders that have been discarded - not voided
Reset Filters - All filters on the "Show" screen have default settings. This button restores all to default.
Save Order Status - This button allows the Order Status to be saved - and used again the next time View Tickets is opened.
OK - dismisses this window.
View - Displays the contents of the selected line item in the View Ticket window.
Edit - Transfers the user to the Order Entry screen with the items from the selected ticket present. On this screen, the user can edit the existing items or add additional items to the order. The order will not be closed automatically until it has been paid.
Void - Remove the order from the list and delete it from the system.
Split - To split a ticket, highlight the ticket to be split and press the Split button. Tickets can be split into up to 9 (for small monitors, 15 for larger monitors) individual tickets.

The ticket will display on the left. Touch the number on the top of the screen to choose how many ways to split the ticket. Each new split will be saved in a separate order. When the split is chosen, the screen divides into the number of chambers or tickets to be created from the order. In this example, the ticket is divided four (4) ways. Touch all items from the ticket that belong together on the new ticket. The items on the original ticket on the left will display in the color of the ticket being created. Repeat the process touching each ticket on the right and filling it with items from the main ticket on the left. NOTE: The first ticket (Split 1) will get all the items initially. This ticket does not need to be built. Items in white on the original ticket will be automatically included on Split 1.
Split item - Items that need to be split between orders can be split up using this tool.

Press the Split Item button after choosing which item to split. Each split will be displayed in the Split Item screen - choose which items get a portion of the split. Click Save when done.
Printing Options - Allows the user to optionally print all or part of the newly created tickets (or splits).
Number of Guests This Ticket - assign the number of guests on each ticket. This is an optional process. This option can be turned on to force guest tallies on all tickets if desired in Point of Success Office Manager - Tools - Order Options (Guest Number).
Combine - To combine two (2) or more tickets onto one ticket, press the Combine button. Choose the tickets to be combined. The ticket that is first chosen will be the ticket that receives all the other tickets to be combined.
Print - Print a ticket for the order.
Pay - Tender payment for the order. This will automatically close the ticket.
Done - Returns user to the main entry screen.
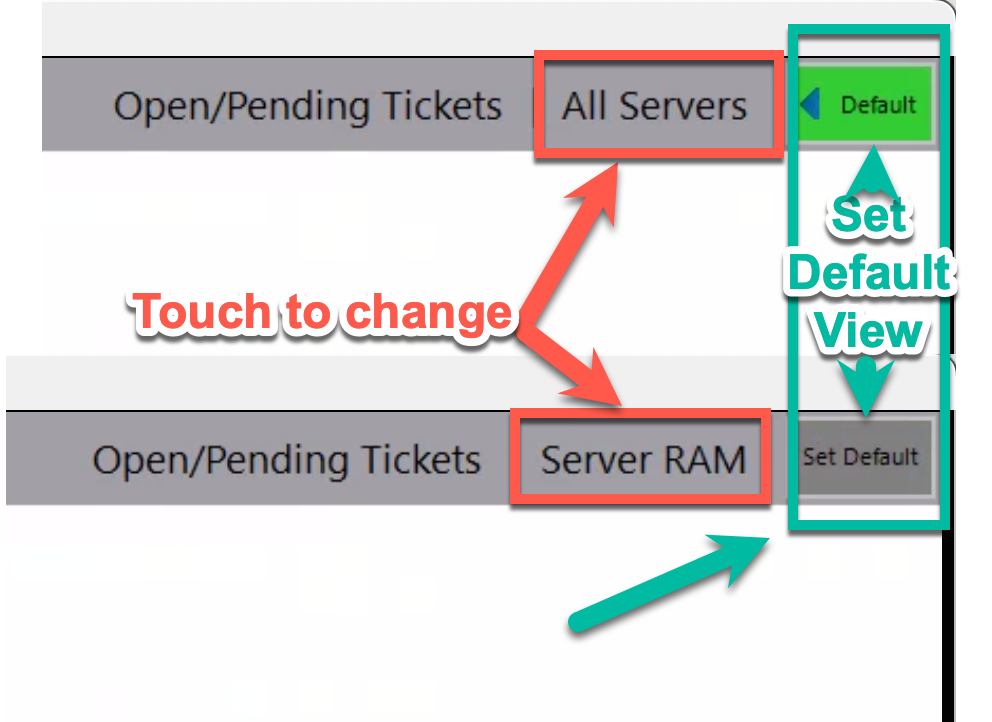
Use the speed buttons to quickly change the view in View Tickets.

Touch the date to move backward one day at a time (to reset to today, touch the top middle of the screen), touch the server to toggle between all servers and the server logged in currently. Touch the Open/Pending Tickets text to toggle between open and closed orders.
To set the default view, use the speed buttons at the top of the screen in View Tickets.