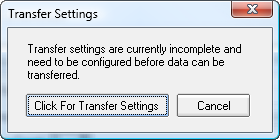
Once CentralPoint Remote is registered, it is ready for setup and operation. The first window displayed upon execution is the Transfer Settings window. Without these setting, the software will not function. Click the 'Click For Transfer Settings' button. An Internet connection and an email account with the ability to send outgoing email from the local computer is required.

Note: HTML or Web-based email address accounts will NOT work unless they have an SMTP/POP3 interface as well.

Store Code - The Store Code is the required code that identifies the data being sent to CentralPoint HQ as belonging to this store. The Store code must be entered and be unique to the store. Use elements of the name that aid in human identification such as city or street names.
Store Email - Each Store has its own email address - key that address in this field.
Central Office Email - This is the email address used in CentralPoint HQ. All Stores send to data to this email address for collection.
Start this program when Microsoft Windows starts - This option allows CentralPoint Remote to start automatically. Since there are scheduled events in CentralPoint Remote, it is good for it to be running at all times whether Point of Success is running or not. If checked, this option ensures that when the computer starts, the software runs.
Start Up Delay (seconds) - This delay allows the database server to startup and be fully functional before CentralPoint Remote attempts to connect to the data. Connection issues can often be resolved by increasing the time delay before startup. This typically need not be longer than 30 seconds.
SMTP Server: This acronym stands for Simple Mail Transfer Protocol - this is the email sending server.
Login Name - The Login Name is the name recorded on the email account for access to the email server.
Password - The Password is the password recorded on the email account for access to the email server.
Confirm Password - The Confirmation Password must be identical to the Password. This check the input since the characters are not displayed in the field.
Test Connection - Once all the configuration information has been entered, press this button to check and see if a connection can be made.